How to Make a Cinemagraph
- Plan
- Record
- Importing and Clipping
- Creating Your Mask
- Editing Your Mask
- Reverse (or Not)
As the old saying goes, "a picture is worth a thousand words." Given that 65% of the population are visual learners, using images as part of your marketing can be the key to ensuring your message gets delivered.
As a marketer, you are probably already aware that images are important. They're easier to digest than a bunch of words on a page and can help support your other content by telling a story in ways that words cannot. Whether in social media posts or in blog posts, images help your audience to better understand what you are talking about, plain and simple.
Cinemagraphs can take things a step further.
What is a cinemagraph, you ask? The artists over at Cinemagraph.com – where the cinemagraph was essentially born – describe them as "an image that contains within itself a living moment that allows a glimpse of time to be experienced and preserved endlessly."
In plain English, a cinemagraph is really just a fancy GIF – a file format often used to create short, infinitely-looping animations for the web. Check out the example below.
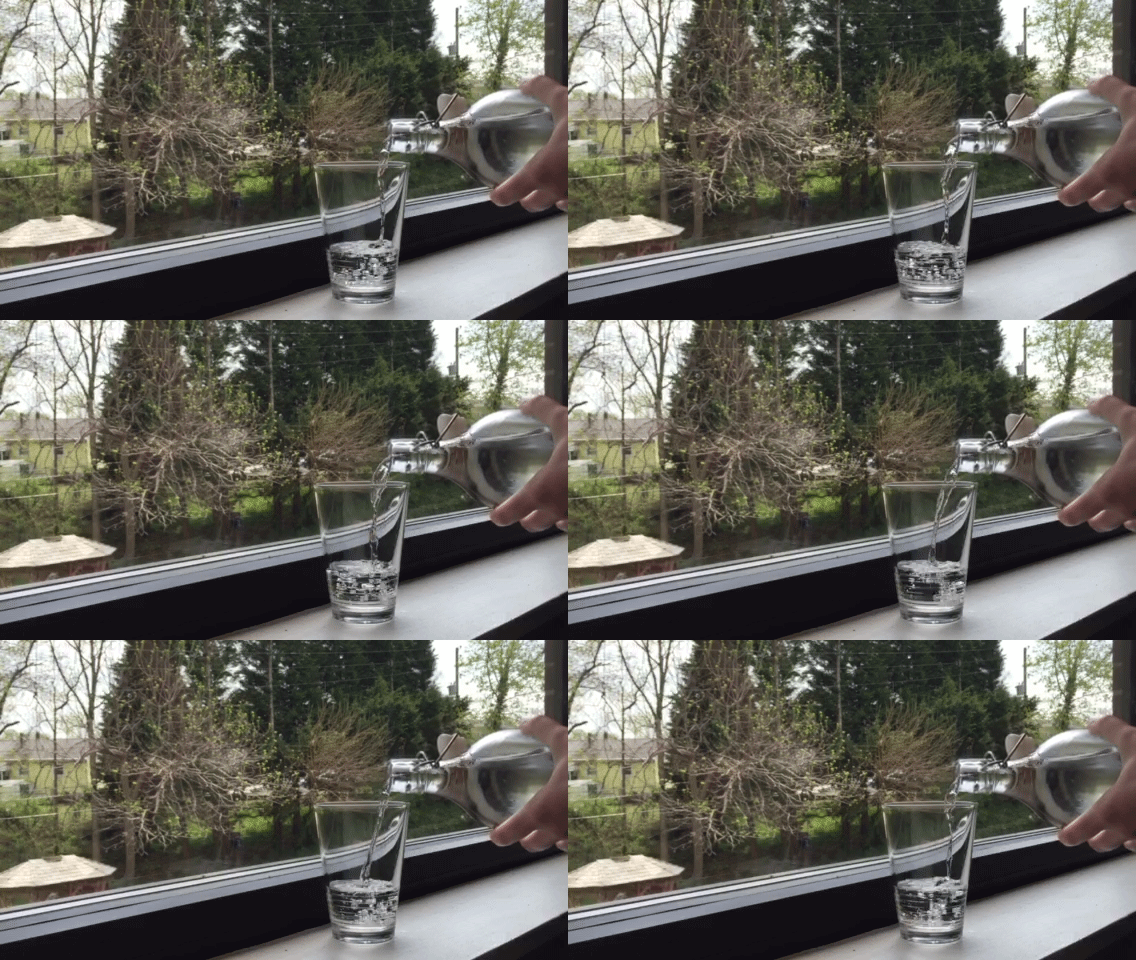
The finalized cinemagraph
GIFs and cinemagraphs can add to blogs and emails in a way that goes beyond a regular photo. And they really aren't difficult to make, especially if you are already familiar with programs like Photoshop.
What Tools Do You Need?
First, you are going to need to make sure you have what you need to create the cinemagraph:
- A way to record video (I used the camera on my iPhone 6)
- A tripod, or some other way to keep your camera stable and completely still
- Adobe Photoshop (I am currently using Adobe Photoshop CC 2014 on my iMac)
How to Make a Cinemagraph
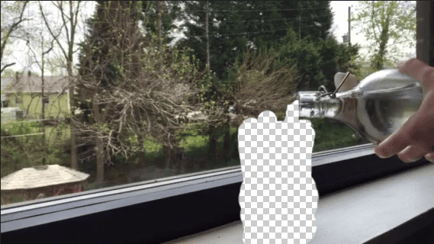
Step 1: Plan!
That image above? That's a little sneak-peak at what you're after. Now this may seem obvious, but a successful cinemagraph needs to be well thought out. If you want to create a cinemagraph that really captivates and mesmerizes your audience, you need to be sure you have a plan in place before you begin.
Consider your subject. Who or what is it? What action is taking place in the video? Which parts will move, and which will remain still?
Keep movement to a minimum. Cinemagraphs are all about subtlety; they aren't flashy or too in-your-face.
Step 2: Record
A cinemagraph is like a living photograph. You want it to look professional.
Be sure you have plenty of natural light, or a way to provide ample light while shooting your subject. Shooting outdoors can often be the easiest way to get great lighting.
Use a tripod. You do not want your camera to move at all during this process, or it will ruin the effect of the cinemagraph and make editing more difficult.
When recording, your subject should move as little as possible. Keep in mind what you want the end result to be – what will move and what will not.
Now, how long should you shoot your video? You really just need to be sure you have a few good seconds of video where the subject is relatively still and any movements are steady.
To create the cinemagraph above, I shot two different takes, each about 15 seconds long. I wanted to be sure that I had at least 5 to 10 seconds where the water was flowing steadily enough that I could work with it easily during the editing process.
Step 3: Importing and Clipping
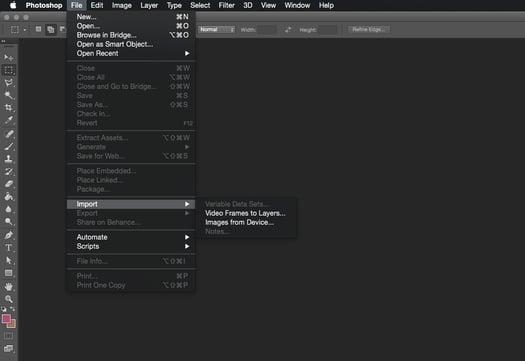
After emailing the video to myself, I imported it into Photoshop by going to File > Import > Video Frames to Layers and selecting the file.
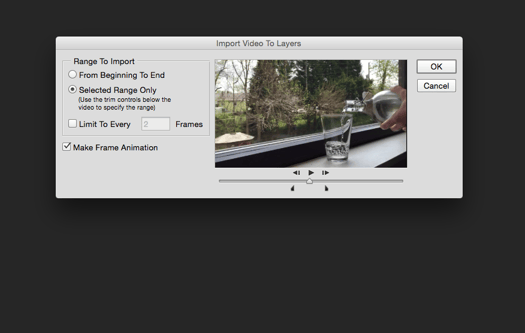
A dialog box will pop up to allow you to clip down the video. I went ahead and cut it down since I only needed the middle of my video. If you don't clip the video down now, you will do it later, but it helps to narrow down the number of video frames you will be importing if you already have an idea which part of the video you want to use.
I didn't limit the frame rate at all, since I wanted to have as many frames to work with as I could.
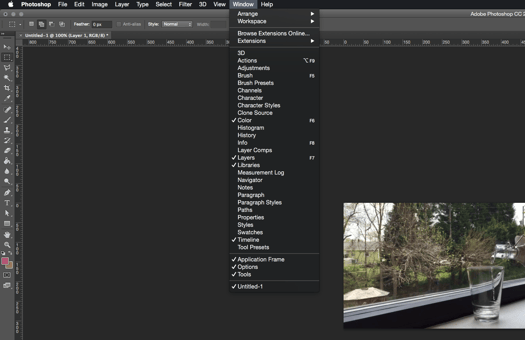
Make sure the Timeline is visible in your window by going to Window > Timeline. You should automatically see the the Frame Timeline, but be aware that Photoshop also has a Video Timeline, and it works the same but looks a little different from what you will see in my screencaps.
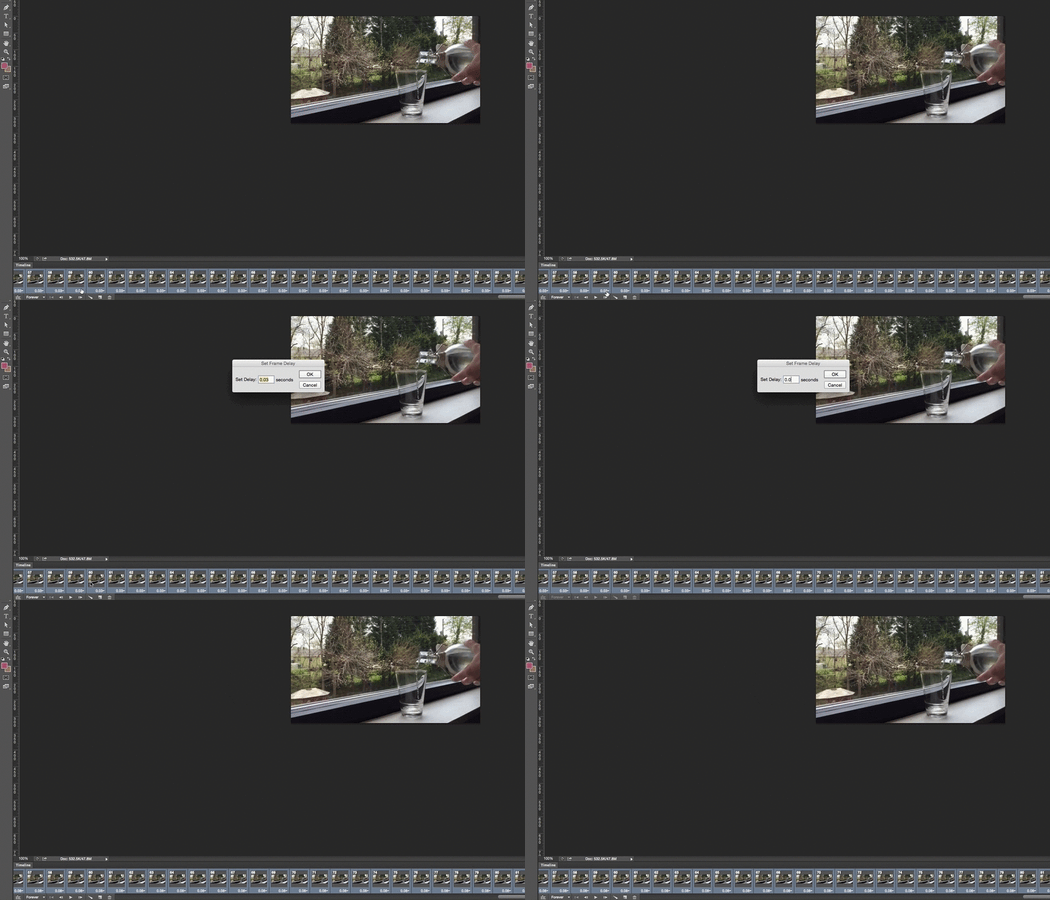
Now that your video is imported, you will see all the imported frames in your Timeline (usually found at the bottom of your Photoshop window).
In the Timeline, you can set the speed at which your video will play back. I set mine at .08 seconds, because it seemed to be playing too quickly when I exported the final file. You may want to experiment with this to find the right frame rate for your video.
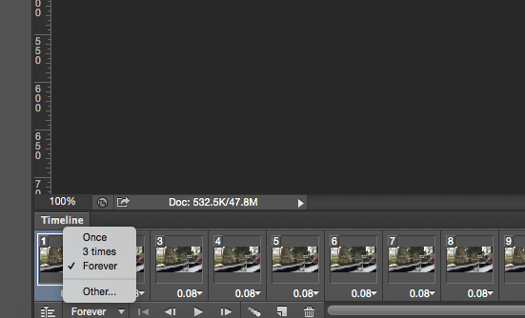
Set your Timeline to repeat Forever, so that your GIF will loop infinitely.
Now, play back the video in Photoshop and delete any frames you don't need until you have just the exact clip you want to show.
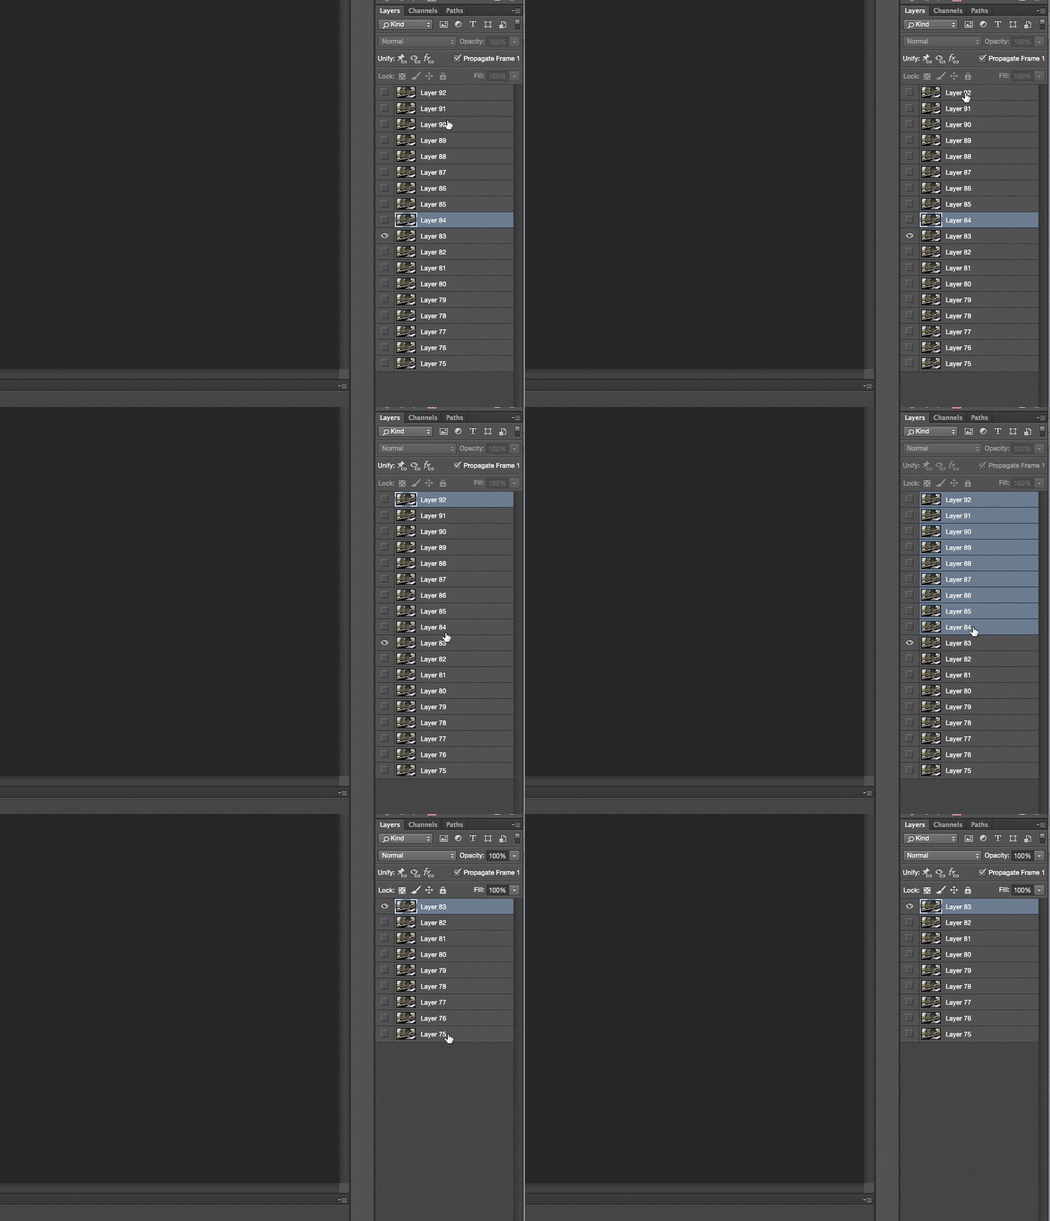
It helps later in the editing process if you delete the layers that correspond to the frames you've deleted, that way they are out of your way.
I only ended up importing about 4 seconds of video, and it amounted to around 90 frames. Once I had deleted all the extra frames I no longer needed, I was down to 10 whole frames, which makes for a very, very short video.
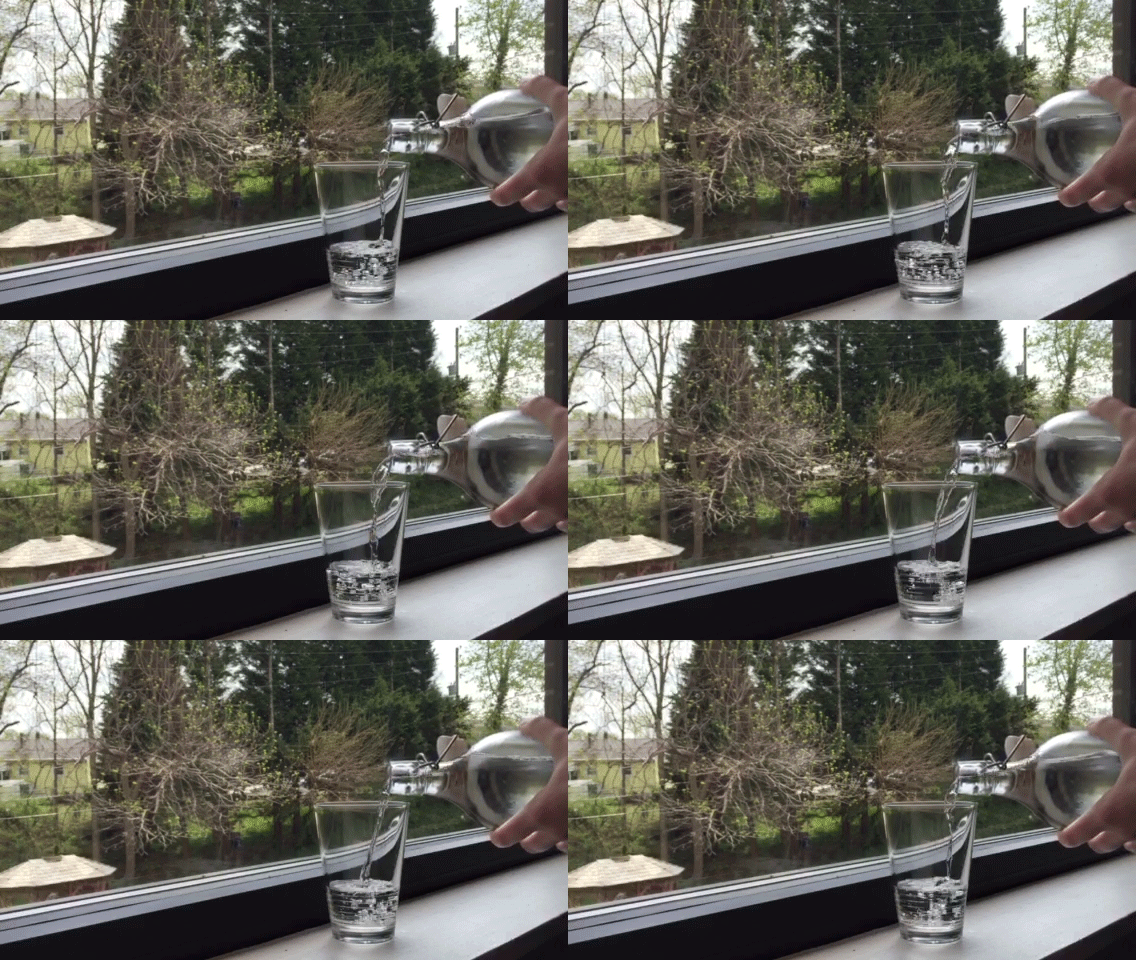
Clipped down (before editing)
Step 4: Creating Your Mask
So now that your video is playing and repeating to your liking (for the most part), you can dive into making it a full-fledged cinemagraph.
To do this you need a layer to cover the layers on each frame and cover up all but the areas you want to see movement.
Select the first frame in your Timeline, and over in your Layers panel duplicate the layer that is visible in that frame. Drag it up above all the other layers, and make sure it's visible. This will be your layer mask. I renamed my layer "Static Mask".
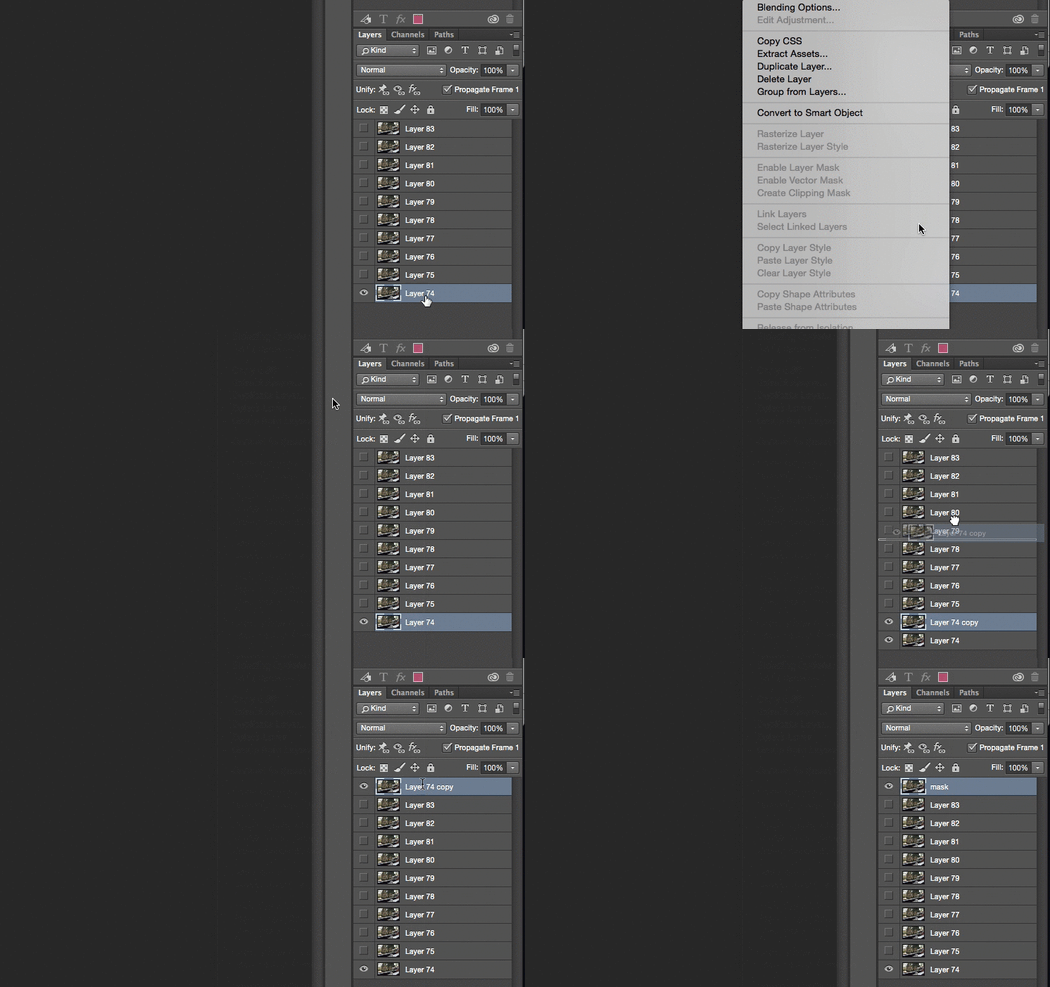
Right now, if you play your video, there shouldn't be any movement at all, because every frame is being covered up by the mask. You've essentially frozen your video, and now you need to unfreeze only the area where you want to see movement.
Step 5: Editing Your Mask
In the Layer panel, select the mask layer and click on the "Add Layer Mask" icon at the bottom of the panel (it looks like a rectangle with a hole in the middle).
Make sure this new white mask layer is selected, and not the image layer.
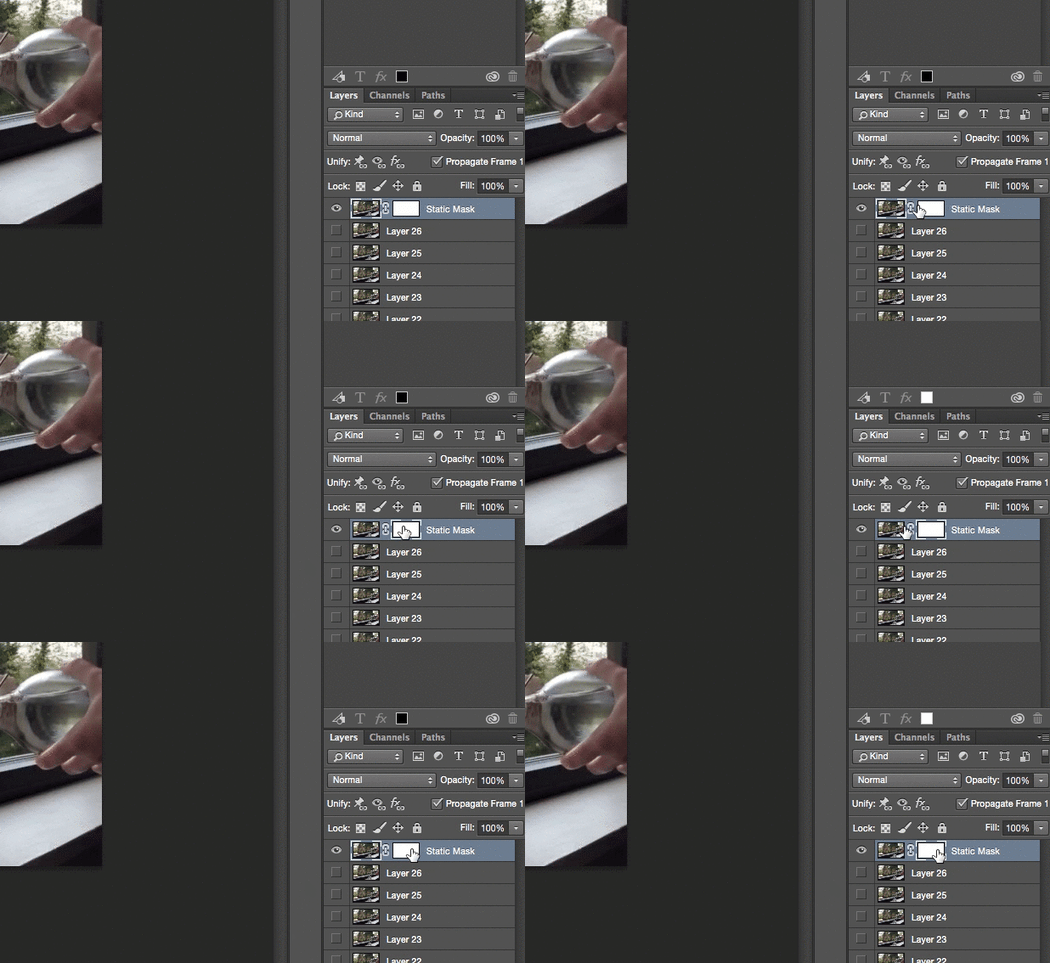
With the Brush Tool, you are going to begin painting over the areas you want to see movement. It helps if you are looking at one of the later frames in your video, since you will be able to see the different layer beneath your mask.
You are essentially erasing the areas that you want to see movement in, while keeping everything else static.
Just make sure that you do not use the Eraser tool. An actual mask is not destructive like the Eraser, and if you accidentally mask an area you later realize you want to move, masks are easier to edit.
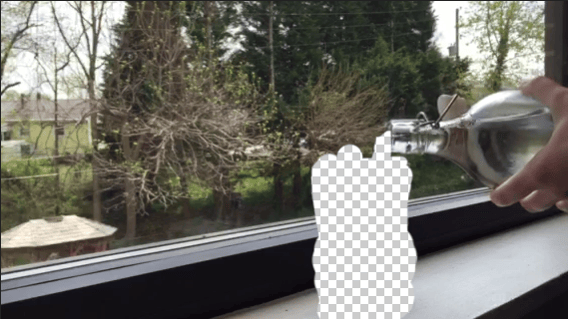
My "Static Mask" layer, after I unmasked the areas in which I wanted movement to happen.
Step 6: Reverse (or Not)
Once you are happy with your mask, you need to figure out if you want your cinemagraph to reverse. This really depends on your subject and how it looks when reversed.
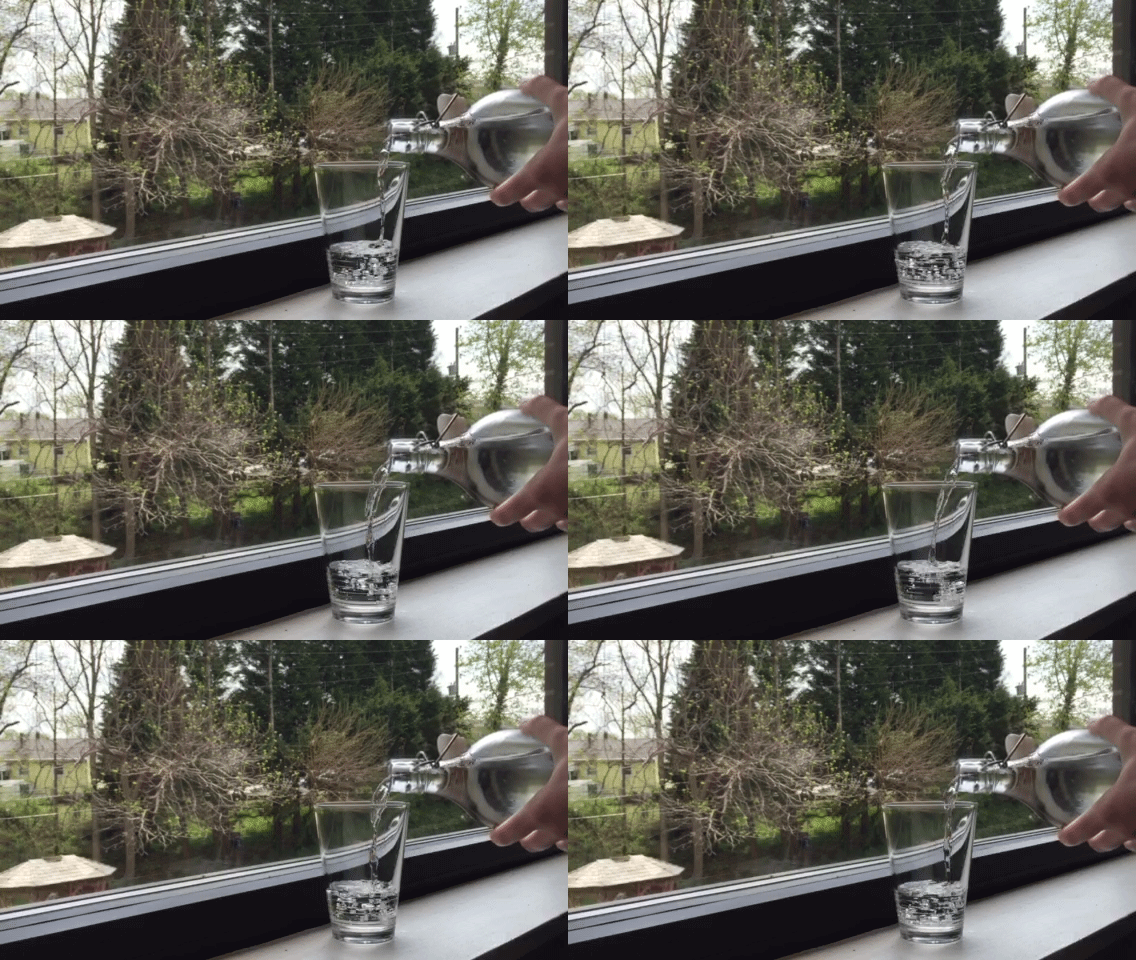
Cinemagraph When Reversed and Repeating
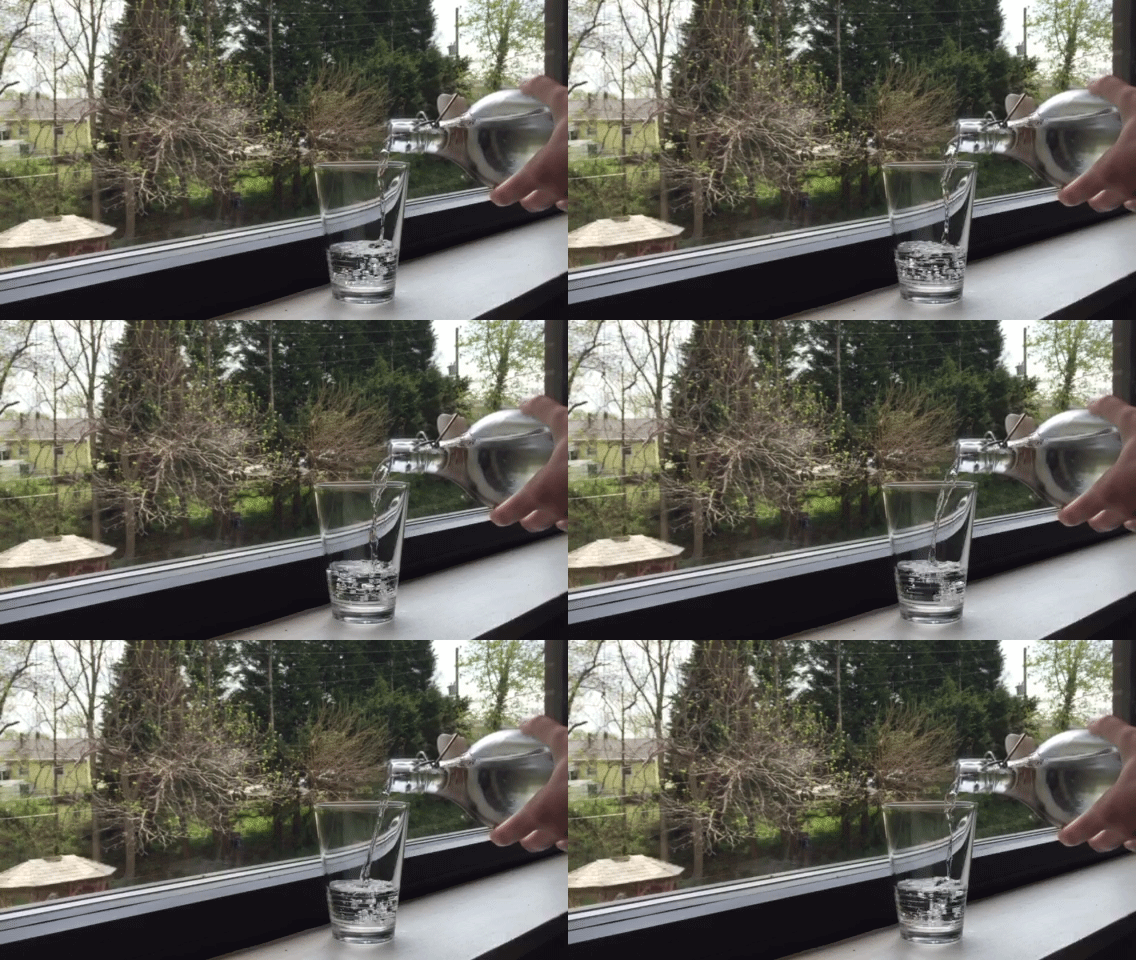
Cinemagraph When Only Repeating
To do this, you will select all of the frames in your Timeline, duplicated them and then reverse the duplicate frames. Now, your video will flow more seamlessly.
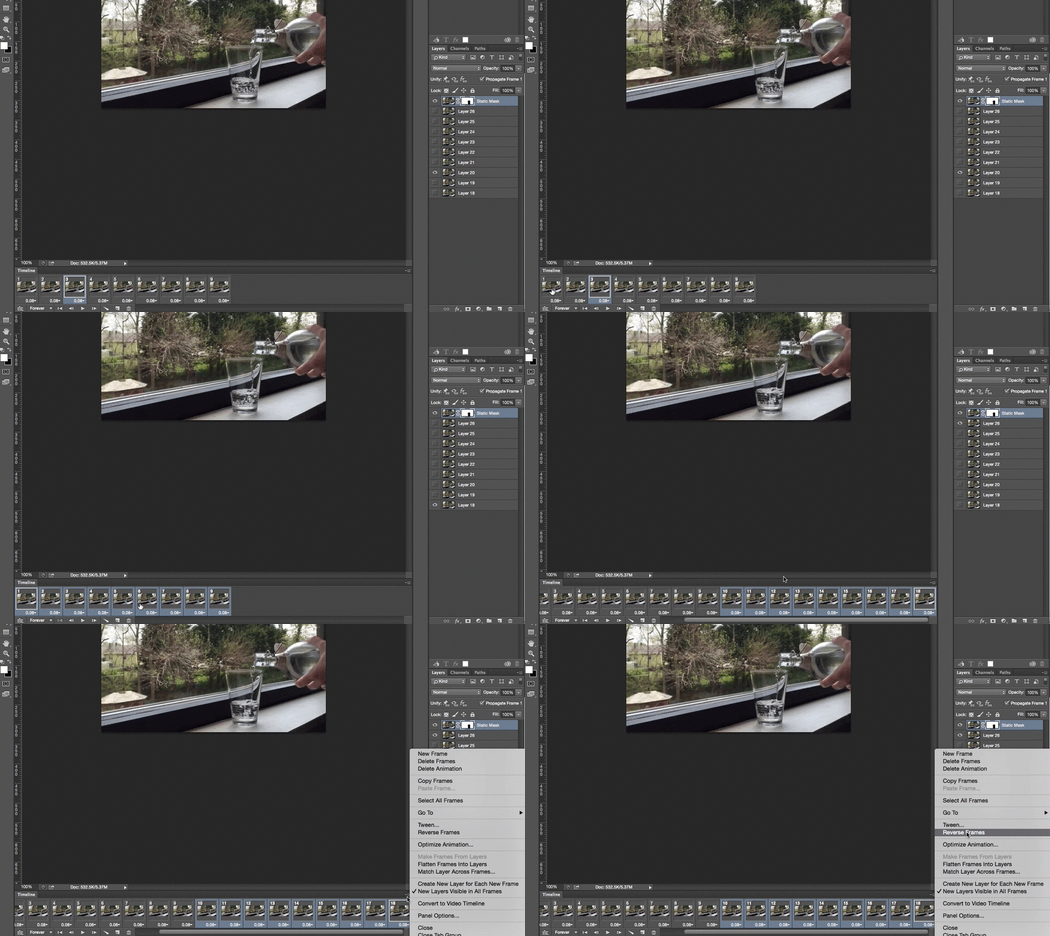
Step 7: Exporting Your Cinemagraph
To export your final cinemagraph, you will go to File > Save for web. The dialog box has many options but you really just need to be sure that you are saving your file as a GIF set to loop forever.
You can even play the GIF in the dialog box, just to get another look at your final product. Click Save when you are happy with the settings.
Congratulations on your new cinemagraph!

Have you played around with cinemagraphs?
No comments:
Post a Comment